

In this series of Blogs I will be walking through the Mastering Process of some of the songs that we have worked on in the recent past. This specific song has majority rock elements with some surprises thrown in between.
This is what the mix looks like
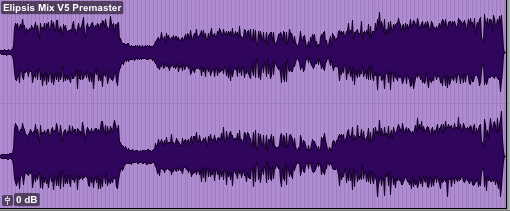
MIX:
https://drive.google.com/a/gray-spark.com/file/d/1_qVYsNawe40TodLwoLlxl_eEtlBHA1dm/view?usp=gmail
The song has some very distinctive heavy sections followed by some mellow clean sections, the key to getting this master right is to drive the mix enough and get enough loudness and energy out of this without really affecting the clean/mellow sections.
EQ
For this song, I’m primarily removing certain buildups that are obvious in the mix.
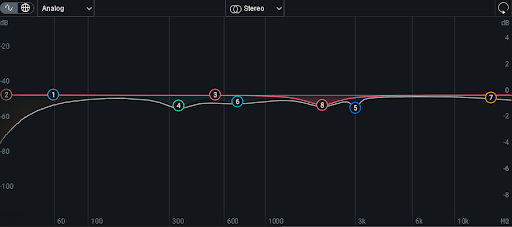
I’m removing the low mid buildup on the distorted guitars at around 330Hz and the shrill top end of the distorted guitars which is making them peak out the mix slightly.
There’s a high pass at roughly 33Hz to roll off all the unnecessary bottom end on this mix, which will help us make this mix louder towards the end.

I have also used another Hi Pass using a mid-side EQ at around 80Hz to get rid of all the bottom end on the sides. The guitars and the reverb seem to create a bit of mush around this region.
Imager
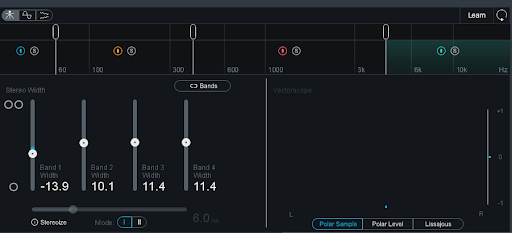
This EQ then goes into the imager where ive turn down the image of low frequencies upto 60Hz to the centre to bring in more tightness to the low end.
There is a slight amount of widening to the other bands
Compression
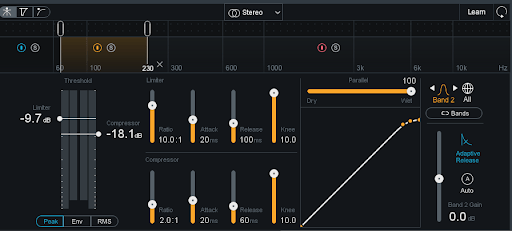
I’m using a multiband compressor after the imager to tame some of the buildups happening in the heavier sections of the song. This buildup is primarily on the bass and the distorted electric guitars as you can hear. This compressor is compressing about 1db at the most. Notice the low ration on the compressor as well
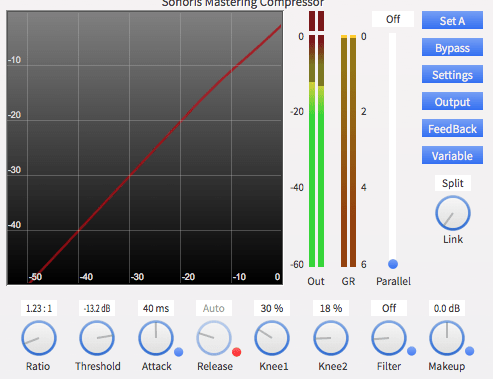
Post this the chain goes into another mastering compressor which takes care of the transients peeking out of this mix. This is again a very low ratio compressor doing about >1dB of compression.
You could probably do without this as well, the mix in itself is compressed and doesnt need more compression but this sounded good when I was working on the master so I just left it.
Drive
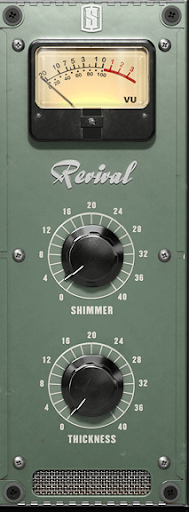
Once the tone of this master is set, I’m using the Slate Digital Mix bus saturation to drive this mix. The first plugin sort of helps me bring out that M curve by bringing up the highs and low just a little and the Mix bus saturation helps add more midrange and drive to this mix.
This gives us more room to increase the apparent loudness of this mix.
Limiting
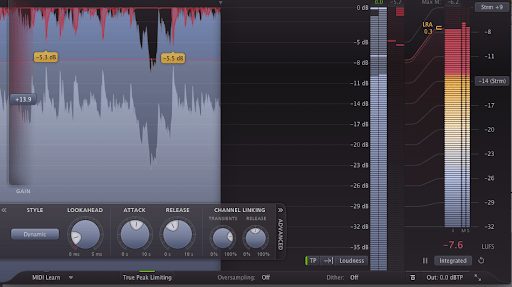
Once the tone of the master is set, I’m using the FF Pro L to limit this mix. Note the settings on the Pro L.
I’ll be covering how to ideally use Pro L in a later section of this blog.
MASTER:
https://drive.google.com/a/gray-spark.com/file/d/1GCfbB2iVRfg8vhewxmEg81Pw_eBTdpKa/view?usp=drive_web
Get in touch!
If you guys have another other questions you would like to shoot at me, just shoot me a mail at ronak@gray-spark.com.
Exclusive